C# SolidWorks 二次开发 API—让用户选择对象后执行操作

C# SolidWorks 二次开发 API—让用户选择对象后执行操作

在做一些交互操作的时候,有时候需要用户做选择。比如对象很多的时候,让用户指定选择某个特征,或者基准面等等。
我用一个简单的例子说明一下如何处理。
这个是例用了solidworks提供的事件来操作,我们需要进行事件的绑定。
查看我的API中文宝典,发现有个官方例子:

这例子也比较简单,我就不多说了。

代码部分:

  //用于事件对象共享。
        private PartDoc partDoc = null;

        private void btnUserSelectFirst_Click(object sender, EventArgs e)
        {
            SldWorks swApp = Utility.ConnectToSolidWorks();

            if (swApp != null)
            {
                ModelDoc2 swModel = (ModelDoc2)swApp.ActiveDoc;

                partDoc = swModel as PartDoc;
                //为当前文件增加选择对象之后 通知事件
                partDoc.UserSelectionPostNotify += PartDoc_UserSelectionPostNotify;
            }
        }

        /// <summary>
        /// 选择之后 处理事件内容
        /// </summary>
        /// <returns></returns>
        private int PartDoc_UserSelectionPostNotify()
        {
            SldWorks swApp = Utility.ConnectToSolidWorks();

            ModelDoc2 swModel = (ModelDoc2)swApp.ActiveDoc;

            var swSelMgr = (SelectionMgr)swModel.SelectionManager;

            var selectType = swSelMgr.GetSelectedObjectType3(1, -1);

            SendMessageToUser("You Select :" + Enum.GetName(typeof(swSelectType_e), selectType));

            return 1;
        }

        /// <summary>
        /// 做完通知之后 ,去掉事件绑定
        /// </summary>
        /// <param name="s"></param>
        private void SendMessageToUser(string s)
        {
            SldWorks swApp = Utility.ConnectToSolidWorks();

            ModelDoc2 swModel = (ModelDoc2)swApp.ActiveDoc;

            swApp.SendMsgToUser(s);

            partDoc.UserSelectionPostNotify -= PartDoc_UserSelectionPostNotify;
        }

逻辑如下:当点击界面上的按钮之后,会给当前零件增加一个事件绑定。用于当用户选择对象之后,进行某些操作。
执行完操作之后,删除绑定(这里按实际需要处理)。

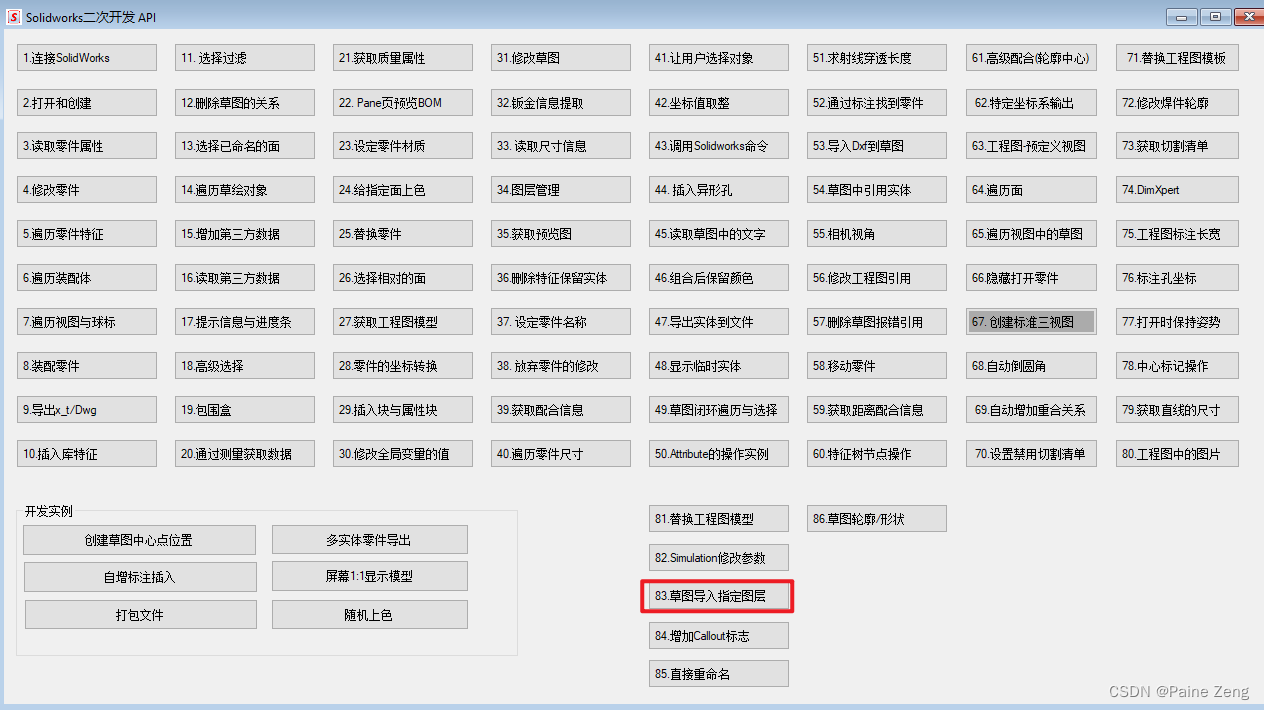
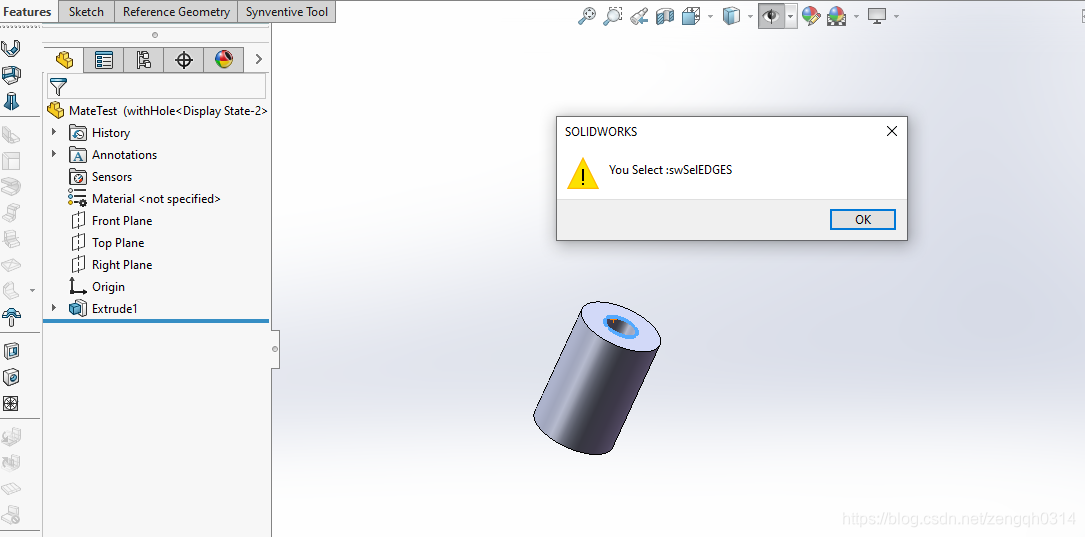
我这个例子结果如下:
posted @
2022-12-23 11:51 
painezeng  阅读(
0)  评论(
0
编辑 
收藏 
举报  
来源

C# SolidWorks 二次开发 API —取整坐标

C# SolidWorks 二次开发 API —取整坐标

这是博文来自于网友的提问。
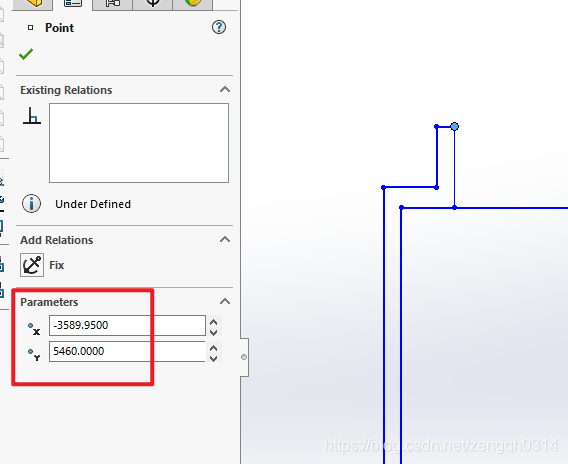
从CAD中复制一些轮廓到Solidworks的草图里面之后,因为软件转换的精度问题,会导致草图直线的一些坐标出来1999.88这种小数,但是实际都是要取整的。 咨询我有没有好的办法可以解决这个问题。
思路: 遍历草图直线,或者端点,在获取完坐标之后 进行取整操作,并修改坐标点位。(因为当前草图全部为活动状态,所以就可以任意修改)
原始状态:

关键代码:

        private void btnRoundPointLoc_Click(object sender, EventArgs e)
        {
            SldWorks swApp = PStandAlone.GetSolidWorks();

            ModelDoc2 swModel = default(ModelDoc2);
            ModelDocExtension swModelDocExt = default(ModelDocExtension);
            SelectionMgr swSelMgr = default(SelectionMgr);
            Feature swFeature = default(Feature);

            //连接文件

            swModel = (ModelDoc2)swApp.ActiveDoc;

            swModelDocExt = (ModelDocExtension)swModel.Extension;

            //选中草图
            var status = swModelDocExt.SelectByID2("Sketch1", "SKETCH", 0, 0, 0, false, 0, null, 0);

            swSelMgr = (SelectionMgr)swModel.SelectionManager;
            //转换
            swFeature = (Feature)swSelMgr.GetSelectedObject6(1, -1);
            //进入编辑草图
            swModel.EditSketch();

            //获取草图中的所有草图点来修改坐标

            var swSketch = (Sketch)swFeature.GetSpecificFeature2();

            var points = (object[])swSketch.GetSketchPoints2();

            for (int i = 0; i < points.Length; i++)
            {
                var p = (SketchPoint)points[i];

                var x = p.X * 1000;
                var y = p.Y * 1000;

                p.X = Math.Round(x, 0) / 1000;
                p.Y = Math.Round(y, 0) / 1000;

                //Debug.Print(p.X.ToString() + " " + p.Y.ToString());
            }

            swModel.EditRebuild3();

            swModel.EditSketch();

            MessageBox.Show("完成了!");
        }

结果:

posted @
2022-12-22 10:18 
painezeng  阅读(
0)  评论(
0
编辑 
收藏 
举报  
来源

SolidWorks二次开发 API-增加指示标记

SolidWorks二次开发 API-增加指示标记

大家应该经常会用到solidworks的测量功能。
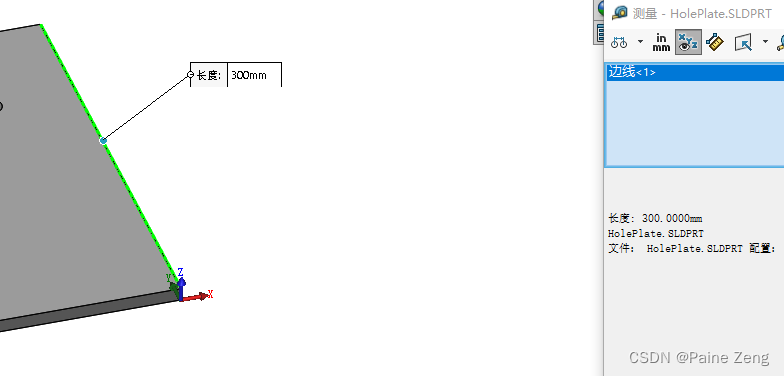
比如测量一个边的长度(当前正常选中之后 ,右下角就会显示长度,不必测量,所以不要抬杠哈):

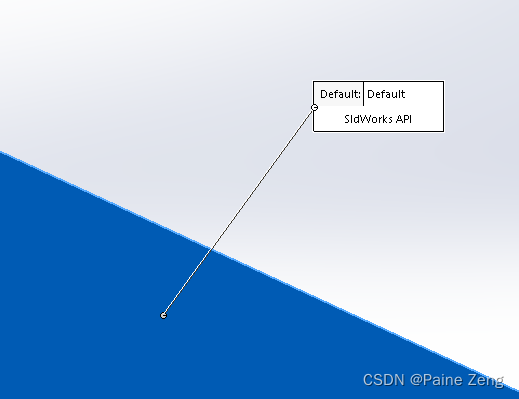
我们今天要讲到的就是上面的这标记,显示了长度: 300mm

在solidworks里面它是叫Callout
Allows add-in applications to manipulate single and multi-row callouts.
它显示是需要插件上用的。但是exe上也是可以出来的。
具体的大家可以在API帮助中查找对应的信息,而且也有相关的例子。我这就不多讲了。

上代码:

private void btnAddCallout_Click(object sender, EventArgs e)
        {
            var swApp = PStandAlone.GetSolidWorks();

            var colortable = (ColorTable)swApp.GetColorTable();
           

            ModelDoc2 swModel;
            ModelDocExtension swExt;
            SelectionMgr swSelMgr;
            MathUtility mathUtil;

            swModel = (ModelDoc2)swApp.ActiveDoc;
            swExt = swModel.Extension;
            swSelMgr = (SelectionMgr)swModel.SelectionManager;

            var mousePoint = (double[])swSelMgr.GetSelectionPoint2(1, -1);

            mathUtil = (MathUtility)swApp.GetMathUtility();
            calloutHandler handle = new calloutHandler();
            MathPoint mp;
            double[] vPnt = new double[3];
            vPnt[0] = 0.0;
            vPnt[1] = 0.0;
            vPnt[2] = 0.0;
            mp = (MathPoint)mathUtil.CreatePoint(mousePoint);
            Callout myCallout;
            myCallout = swExt.CreateCallout(2, handle);
            myCallout.set_Value(1, "-");
            myCallout.set_IgnoreValue(1, true);
            myCallout.set_Label2(1, "SldWorks API");
            //myCallout.SkipColon = true;
            //myCallout.TextColor[0] = t.GetColorRefAtIndex(0); 这里的颜色颜色好像没有测试出来。
            //myCallout.OpaqueColor = t.GetColorRefAtIndex(1);

            myCallout.SetLeader(true, false);
            myCallout.SetTargetPoint(0, mousePoint[0], mousePoint[1], mousePoint[2]);
            //myCallout.SetTargetPoint(2, -0.001, 0.001, 0);
            myCallout.Position = mp;
            myCallout.set_ValueInactive(0, true);
            myCallout.TextBox = false;
            myCallout.Display(true);

            TextFormat swTextFormat = myCallout.TextFormat;
            ProcessTextFormat(swApp, swModel, swTextFormat);


        }
        public void ProcessTextFormat(SldWorks swApp, ModelDoc2 swModel, TextFormat swTextFormat)
        {

            Debug.Print(" BackWards = " + swTextFormat.BackWards);
            Debug.Print(" Bold = " + swTextFormat.Bold);
            Debug.Print(" CharHeight = " + swTextFormat.CharHeight);
            Debug.Print(" CharHeightInPts = " + swTextFormat.CharHeightInPts);
            Debug.Print(" CharSpacingFactor = " + swTextFormat.CharSpacingFactor);
            Debug.Print(" Escapement = " + swTextFormat.Escapement);
            Debug.Print(" IsHeightSpecifiedInPts = " + swTextFormat.IsHeightSpecifiedInPts());
            Debug.Print(" Italic = " + swTextFormat.Italic);
            Debug.Print(" LineLength = " + swTextFormat.LineLength);
            Debug.Print(" LineSpacing = " + swTextFormat.LineSpacing);
            Debug.Print(" ObliqueAngle = " + swTextFormat.ObliqueAngle);
            Debug.Print(" Strikeout = " + swTextFormat.Strikeout);
            Debug.Print(" TypeFaceName = " + swTextFormat.TypeFaceName);
            Debug.Print(" Underline = " + swTextFormat.Underline);
            Debug.Print(" UpsideDown = " + swTextFormat.UpsideDown);
            Debug.Print(" Vertical = " + swTextFormat.Vertical);
            Debug.Print(" WidthFactor = " + swTextFormat.WidthFactor);

            Debug.Print("");

        }

如果 就是这样了哈

posted @
2022-11-30 18:30 
painezeng  阅读(
0)  评论(
0
编辑 
收藏 
举报  
来源

SolidWorks二次开发 API-单独导入某个2d图层数据

SolidWorks二次开发 API-单独导入某个2d图层数据

之前在第53个功能中讲过了如何直接导入dxf文件到solidworks的草图中。
今天我们来讲一下如何导入某个图层上的数据,这两个功能所使用的api有区别。
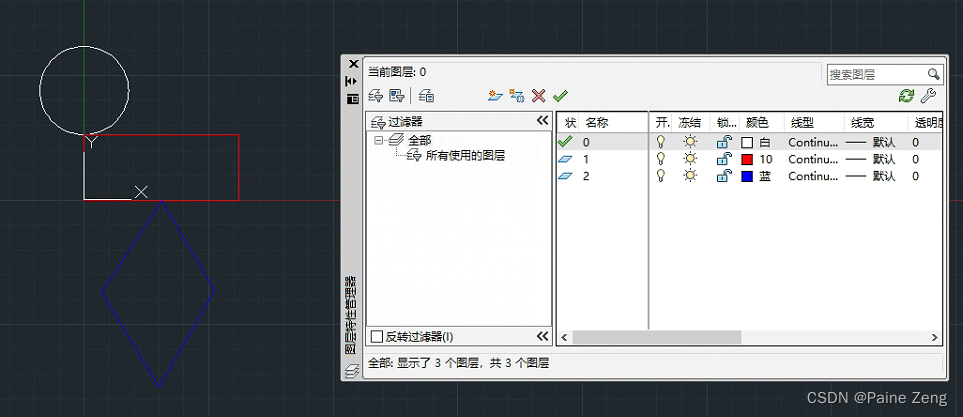
如下图,cad中有三个图层,每个层里有一个形状。

现在我们用代码把图层2 导入到solidworks中。

  var swApp = PStandAlone.GetSolidWorks();

            string partDefaultTemplate = swApp.GetDocumentTemplate((int)swDocumentTypes_e.swDocPART, "", 0, 0, 0);
            
            var newDoc = swApp.NewDocument(partDefaultTemplate, 0, 0, 0);
                        
            var swModel = (ModelDoc2)swApp.ActiveDoc;

            var actPath = RegDllPath("");

            var start = actPath.Substring(0, actPath.IndexOf("CSharpAndSolidWorks", 0));        

            var dwgPath = $@"{start}CSharpAndSolidWorks\CSharpAndSolidWorks\TemplateModel\ImportDWG.dwg";

            bool boolstatus = swModel.Extension.SelectByID2("前视基准面", "PLANE", 0, 0, 0, false, 0, null, 0);
            if (!boolstatus)
            {
                 boolstatus = swModel.Extension.SelectByID2("Front Plane", "PLANE", 0, 0, 0, false, 0, null, 0);

                if (!boolstatus)
                {
                    boolstatus = swModel.Extension.SelectByID2("Front", "PLANE", 0, 0, 0, false, 0, null, 0);

                    if (!boolstatus)
                    {
                        boolstatus = swModel.Extension.SelectByID2("Plane1", "PLANE", 0, 0, 0, false, 0, null, 0);

                        if (!boolstatus)
                        {
                            MessageBox.Show("请选中一个基准面,再点确定。");

                        }           
                        
                    }
                }
            }


            ImportDxfDwgData importData = default(ImportDxfDwgData);

            importData = (ImportDxfDwgData)swApp.GetImportFileData(dwgPath);

            importData.set_LengthUnit("", (int)swLengthUnit_e.swMM);
                       
            var bRet = importData.SetPosition("", (int)swDwgImportEntitiesPositioning_e.swDwgEntitiesCentered, 0, 0);
               
            importData.set_ImportMethod("", (int)swImportDxfDwg_ImportMethod_e.swImportDxfDwg_ImportToExistingPart);

            importData.SetMergePoints("", true, 0.001);

            importData.SetImportLayerVisibility(null, (int)swImportDxfDwg_LayerVisibility_e.swImportDxfDwg_LayerHidden);

            var listLayerNames = new List<string>() { "2" };
            var tempArray = listLayerNames.ToArray();
            object layers = tempArray;
            importData.SetImportLayerVisibility(layers, (int)swImportDxfDwg_LayerVisibility_e.swImportDxfDwg_LayerVisible);
               
            var LayFea01 = swModel.FeatureManager.InsertDwgOrDxfFile2(dwgPath, importData);

            if (LayFea01!=null)
            {
                LayFea01.Name = "导入的图层2";
            }
   

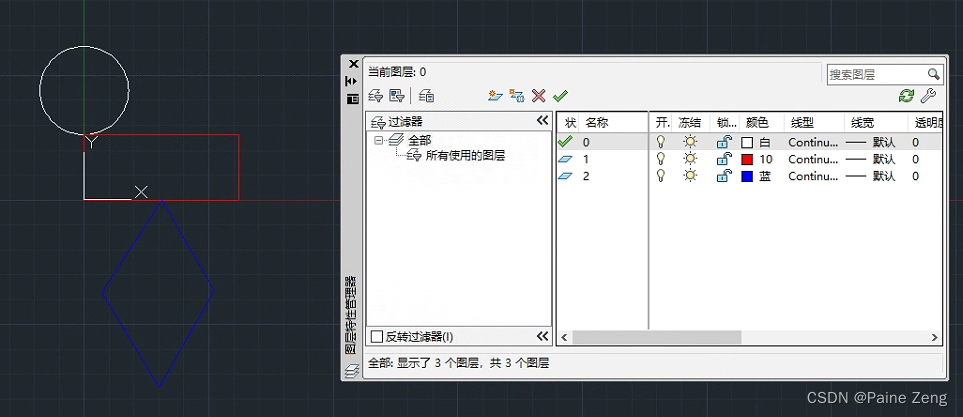
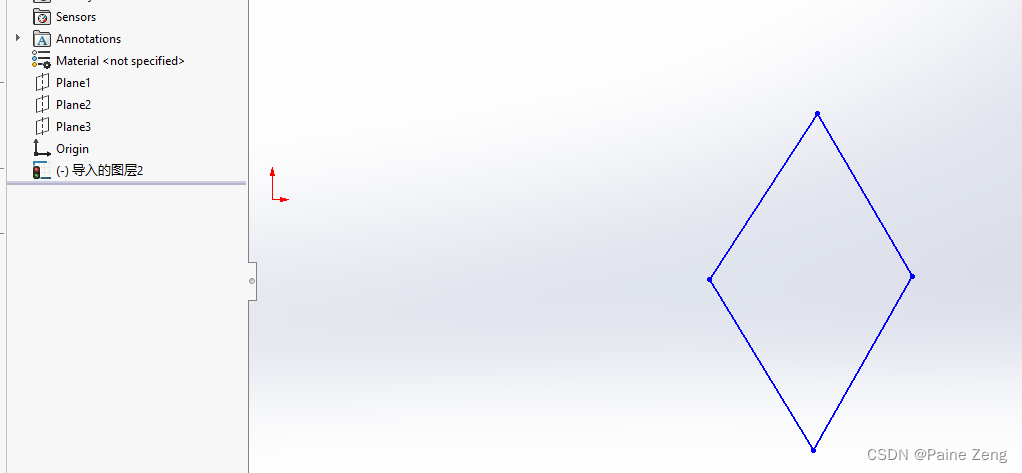
执行完成,结果如下图:

是不是很完美,本文结束。我要去看球赛了。

posted @
2022-11-29 19:00 
painezeng  阅读(
0)  评论(
0
编辑 
收藏 
举报  
来源

SolidWorks二次开发 API-SOLIDWORKS Simulation分析参数修改

SolidWorks二次开发 API-SOLIDWORKS Simulation分析参数修改

今天我们来讲个小例子。
是关于SOLIDWORKS Simulation的。
先说明一点,这东西我也不熟。有问题别问我

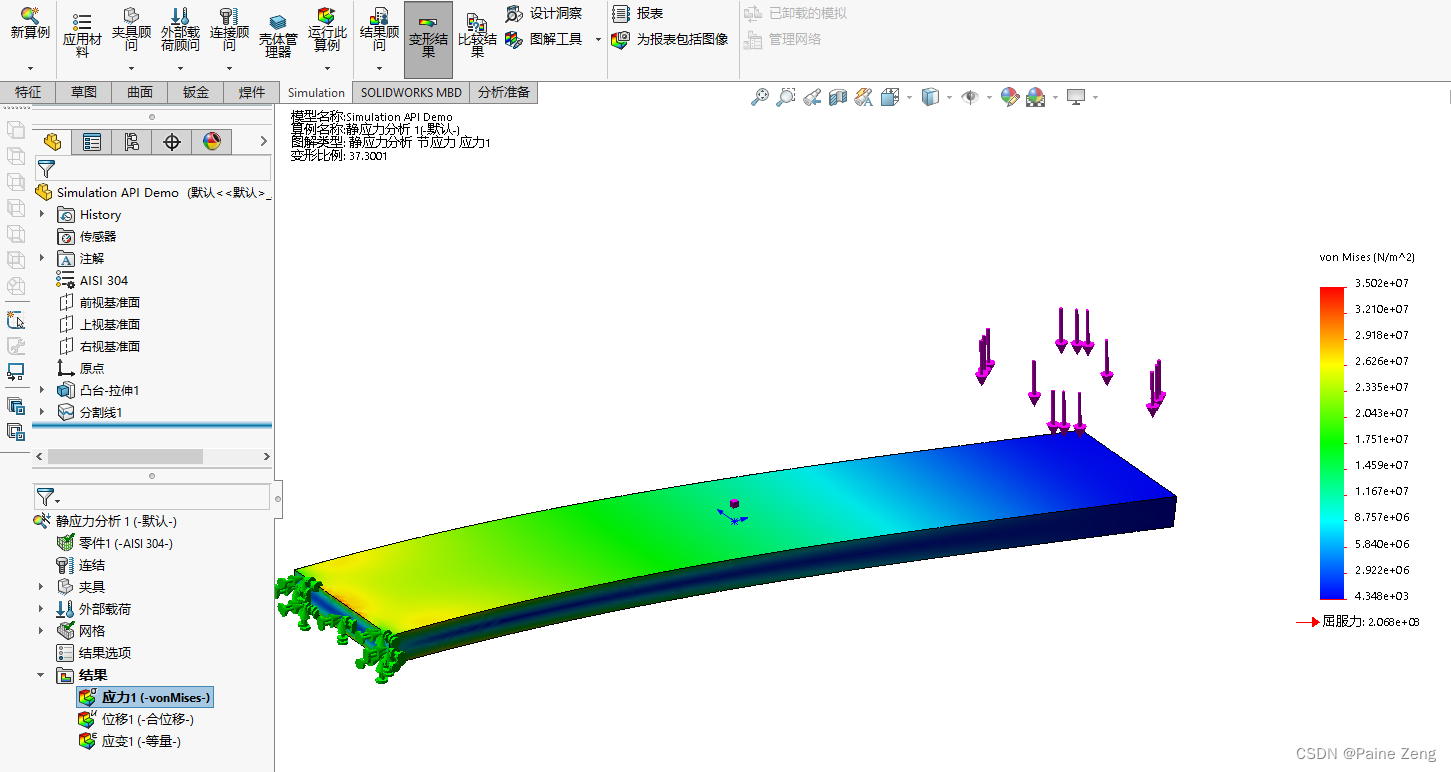
首先,我做了一个很难的分析,条件也是很复杂,具体操作我就不说了,分析结果如下:

当然这个图和我们今天要做的事情 关系不大,我们主要了解 一下如何连接到SOLIDWORKS Simulation 上并修改载荷参数,重新运行分析,得到新的结果 。
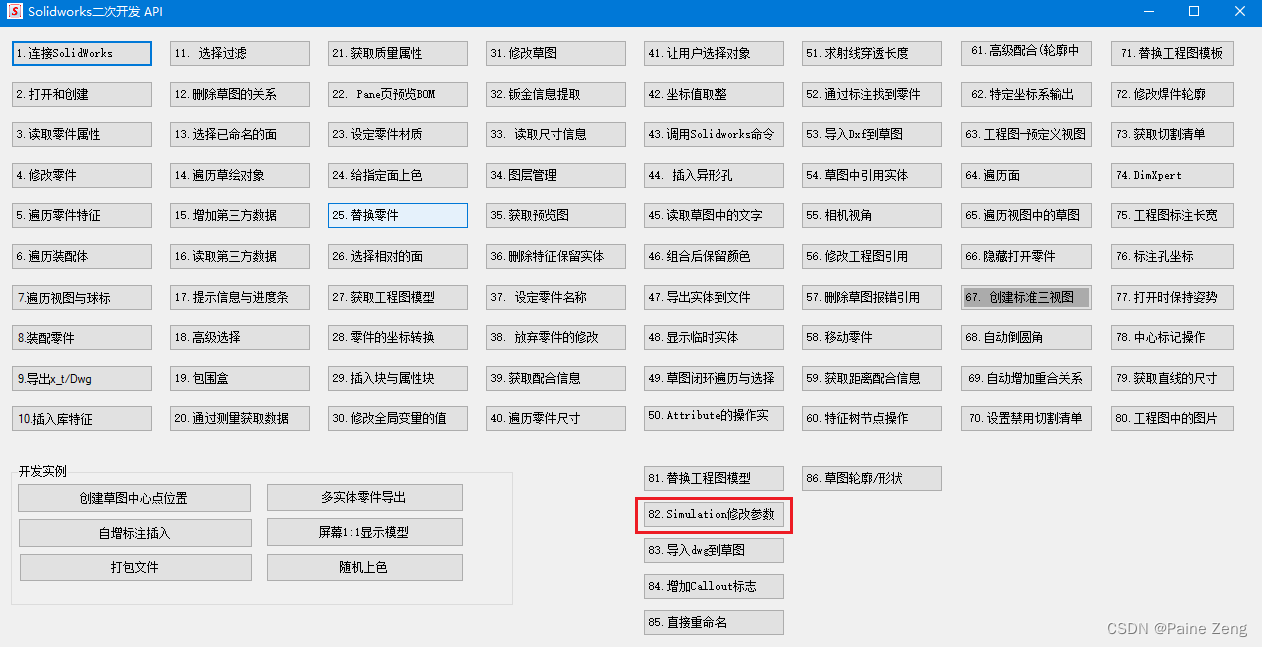
具体的api查找过滤和之前看帮助类似,我就直接上图了:

下面是关键代码:
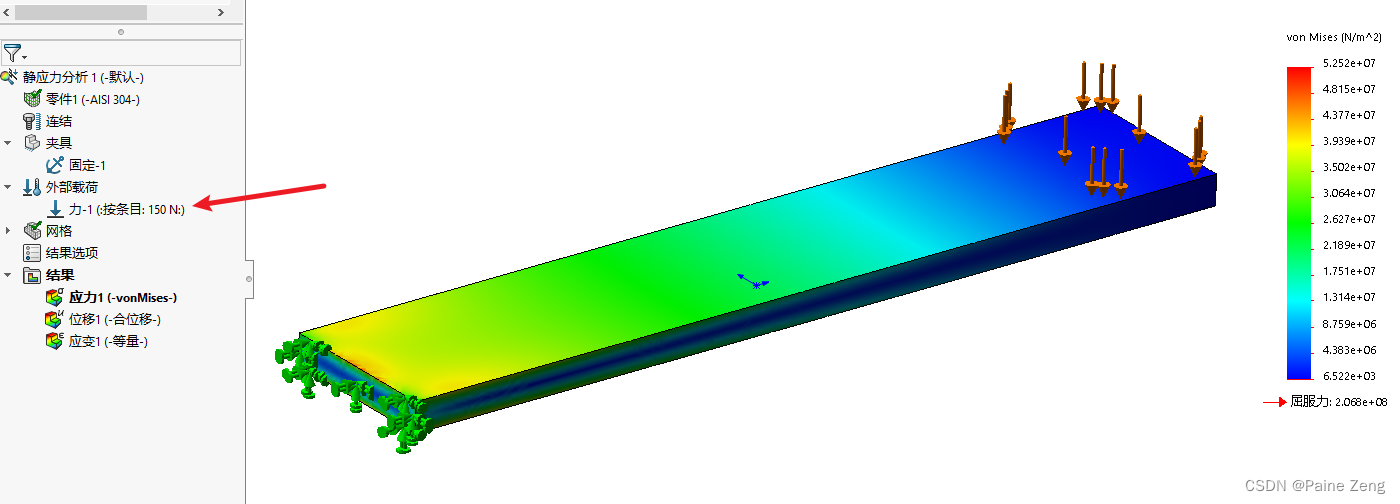
把上面的力的大小从100 改成150,然后重新进行风格的划分,运行计算。
`
private void btnSimStudy_Click(object sender, EventArgs e)
{
var actPath = RegDllPath(“”);

        var start = actPath.Substring(0,actPath.IndexOf("CSharpAndSolidWorks",0));
                

        var partPath = $@"{start}CSharpAndSolidWorks\CSharpAndSolidWorks\TemplateModel\Simulation API Demo.SLDPRT";

        SldWorks swApp = PStandAlone.GetSolidWorks();

    
        CWModelDoc swsActDoc = default(CWModelDoc);
        CWStudyManager swsStudyMngr = default(CWStudyManager);
        CWStudy swsStudy = default(CWStudy);
        CWLoadsAndRestraintsManager swsLBCMgr = default(CWLoadsAndRestraintsManager);
        CWForce swsCWForce = default(CWForce); 

        int errors = 0;
        int warnings = 0;
   

        string fileName = partPath;

        // 打开模型
        var swModel = (ModelDoc2)swApp.OpenDoc6(fileName, (int)swDocumentTypes_e.swDocPART, (int)swOpenDocOptions_e.swOpenDocOptions_Silent, "", ref errors, ref warnings);

        // Get the SOLIDWORKS Simulation object
        dynamic COSMOSWORKS = default(dynamic);
        dynamic COSMOSObject = default(dynamic);

        // Determine host SOLIDWORKS major version
        int swVersion = Convert.ToInt32(swApp.RevisionNumber().Substring(0, 2));

        // Calculate the version-specific ProgID of the Simulation add-in that is compatible with this version of SOLIDWORKS
        int cwVersion = swVersion - 15;
        String cwProgID = String.Format("SldWorks.Simulation.{0}", cwVersion);
        Debug.Print(cwProgID);

        // Get the SOLIDWORKS Simulation object
        COSMOSObject = swApp.GetAddInObject(cwProgID);

        COSMOSWORKS = COSMOSObject.CosmosWorks;

        // Open and get active document
        swsActDoc = (CWModelDoc)COSMOSWORKS.ActiveDoc;

        if (swsActDoc == null) ErrorMsg(swApp, "No active document");

        // Create new static study
        swsStudyMngr = (CWStudyManager)swsActDoc.StudyManager;
        if (swsStudyMngr == null) ErrorMsg(swApp, "No CWStudyManager object");

        //得到第一个算例对象
        swsStudy = (CWStudy)swsStudyMngr.GetStudy(0);

        //算例名称,可以区分多个算例   swsStudy.Name


        if (swsStudy == null) ErrorMsg(swApp, "No CWStudy object");

        swsLBCMgr = (CWLoadsAndRestraintsManager)swsStudy.LoadsAndRestraintsManager;

        //get the Force Feature
        //这是是第一个条件,所以参数写0
        var sCwForce = swsLBCMgr.GetLoadsAndRestraints(0, out int errcode);

        if (sCwForce != null)
        {
            var swForce = (CWForce)sCwForce;
        
            swForce.ForceBeginEdit();


            //修改值为150
            swForce.NormalForceOrTorqueValue = 150;  
            var res = swForce.ForceEndEdit();

        }

        //Create mesh
        var CwMesh = (CWMesh)swsStudy.Mesh;

        if (CwMesh == null) ErrorMsg(swApp, "No mesh object");

        CwMesh.Quality = 1;
        CwMesh.GetDefaultElementSizeAndTolerance(0, out double el, out double tl);
        var errCode = swsStudy.CreateMesh(0, el, tl);
        if (errCode != 0) ErrorMsg(swApp, "Mesh failed");

        //Run
        swsStudy.RunAnalysis();
    }

    public void ErrorMsg(object swApp, string Message)
    {
        MessageBox.Show(Message);
        MessageBox.Show("'*** WARNING - General");
        MessageBox.Show("'*** " + Message);
        MessageBox.Show("");
    }

`
这样结果出来了,至于怎么拿到最新的结果 ,或者说截图的话后面有机会再讲了。
源码位置:
https://gitee.com/painezeng/CSharpAndSolidWorks

posted @
2022-11-25 20:00 
painezeng  阅读(
0)  评论(
0
编辑 
收藏 
举报  
来源

C# SolidWorks 二次开发 API-替换工程图视图引用

C# SolidWorks 二次开发 API-替换工程图视图引用

1024-程序员的节日。
但为什么不放假呢?
今天主要是为了拿个徽章,顺便完成这个月的小目标。

这个功能之前提过,感觉好像有很多尺寸的时候关联可能会丢失吧。
但想想这个有些情况还可能用的到,就先写下来充个数吧。

        /// <summary>
        /// 工程图替换文件引用
        /// </summary>
        /// <param name="sender"></param>
        /// <param name="e"></param>
        private void btnReplaceModelForView_Click(object sender, EventArgs e)
        {
            var actPath = RegDllPath("");

            var start = actPath.Substring(0, actPath.IndexOf("CSharpAndSolidWorks", 0));

            var oldPartName = $@"{start}CSharpAndSolidWorks\CSharpAndSolidWorks\TemplateModel\replaceDrawingRef\AA(BB).SLDPRT";

            var newPartName = $@"{start}CSharpAndSolidWorks\CSharpAndSolidWorks\TemplateModel\replaceDrawingRef\AA(BB) - 副本.SLDPRT";

            var swApp = PStandAlone.GetSolidWorks();

            var swModel = (ModelDoc2)swApp.ActiveDoc;

            var docModel = swModel as DrawingDoc;

            var views = (object[])docModel.GetViews();

            List<View> views1 = new List<View>();
            List<Component2> comps1 = new List<Component2>();


            for (int i = 0; i < views.Length; i++)
            {
                var tempV = (object[])views[i];

                if (tempV.Length>1)
                {
                    for (int j =1; j < tempV.Length; j++)
                    {
                        var tempView = (View)tempV[j];
                        if (tempView.RootDrawingComponent.Component!=null)
                        {
                            if (tempView.RootDrawingComponent.Component.IGetModelDoc().GetPathName().ToUpper() == oldPartName.ToUpper())
                            {
                                views1.Add(tempView);
                                comps1.Add(tempView.RootDrawingComponent.Component);
                            }

                        }
                        else
                        {
                            var visComps = (object[])tempView.GetVisibleComponents();

                            if (tempView.GetVisibleComponentCount()==1 && ((visComps[0] as Component2).IGetModelDoc().GetPathName().ToUpper() == oldPartName.ToUpper()))
                            {
                                views1.Add(tempView);
                                comps1.Add(visComps[0] as Component2);
                            }

                        }

                    }

                }


            }


            //DispatchWrapper[] viewsIn = new DispatchWrapper[views1.Count];
            //DispatchWrapper[] instancesIn = new DispatchWrapper[views1.Count];


            var res= docModel.ReplaceViewModel(newPartName, views1.ToArray(), comps1.ToArray());

        }

代码就这些了,也就不细讲了。
主要就是遍历所有视图,然后传对应的参考组件,返回替换结果 。

posted @
2022-10-24 17:15 
painezeng  阅读(
0)  评论(
0
编辑 
收藏 
举报  
来源